
DIY FEMINIST EMBROIDERED JEAN JACKET
- Jan 25, 2017
- 3 min read

Hey everyone!! So many events occurred last week in our country. The President was inaugurated, which may not have been what we were looking forward to, but there were huge turnouts at Women's Marches all over the country where we could express our opinions and emphasize the importance of equality. This project is inspired by all of the female empowerment surrounding me in my life, my love for STEM, and my hopes for a future founded on equality!
I've always wanted to learn how to embroider, and I thought this would be the perfect project to start with because of it's importance to me. My conclusions are: Embroidering is not as easy as it looks! It takes a lot of time and detail, but it can be relaxing, and the end result is worth all the sore thumbs and needle-pricked fingers! Keep on reading to see how I made my Steminist jean jacket!
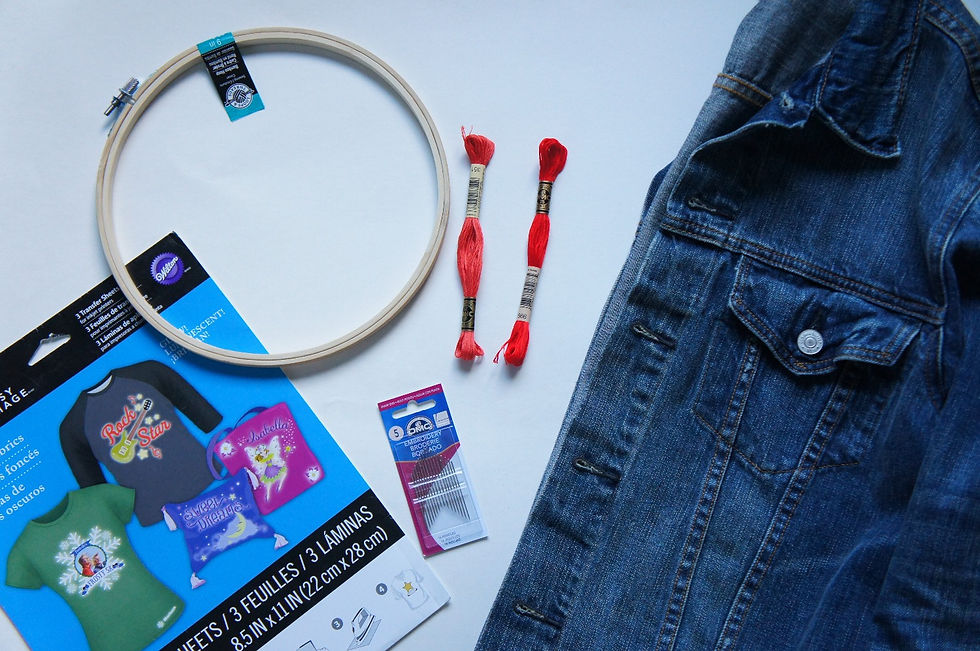
What I used:
- An old jean jacket
- An embroidery hoop
- Red, dark orange, black (not pictured), and white (not pictured) embroidery thread
- Dark fabric transfer paper (DO NOT USE THIS!!! You'll see why)
- Embroidery needles

First thing's first: Pick out a design online, or draw one yourself! I found this really cool graphic on Redbubble that I wanted to recreate because of my passion for STEM, and feminism of course :) Print your design out on regular paper to get you sizing and placement right before you use transfer paper. Here's where I went wrong. DO NOT buy dark fabric transfer paper! I almost ruined my jacket! After doing some impromptu research right before ironing on my design, I realized the white background would transfer onto my jacket as well as the intended design, which is not what I was looking for! The transfer is supposed to be an outline for where to embroider. Now when I embroider, I use Paper Solvy, which is much better and is meant for projects like this.

Instead of using the transfer paper for it's real purpose, I used it like regular paper and fastened it into the embroidery hoop along with my jacket.

Time to actually start embroidering! A lot of what I did was freestyling, but I thought I'd show you how to do the two main stitches that I used:


This is a satin stitch! I used this stitch the most out of anything because it's great for filling in letters and large spaces, plus it looks really high quality. The easiest way I can describe it is that it's basically like making a bunch of lines in a tight row to fill up a space. Start by creating one stitch in your fabric, and then keep repeating that stitch as close together as possible.

This entire symbol was embroidered with satin stitches! It's pretty time consuming, but it gives a great result. Another way to satin stitch is to outline the shape first with thread, and then satin stitch for a more finished look. For this shape, I thought it would look better without the outlining. :)


Next is a running stitch! This is basically a regular sewing stitch, and I used it for most of the little details. The spaces in between your stitches can be as large or small as you want!

Again, most of these little details were done with a running stitch. Super easy!

Hours and HOURS later, this was my result! This is where it got tricky, because I had to find a way to get the transfer paper out without ruining all my work. I ended up ripping it right out, which didn't hurt my embroidery too much, but again... Paper Solvy is so much better because this situation won't happen.
After the outline is gone, fill in all the parts you think may need some extra help. For example, I added some pops of white in the center of the female symbol and fixed some awkward stitches.


Et voila! SO HAPPY I did this. It's really rewarding to wear your hard work around, especially when it has a good message. I hope this post inspired you to start your own project, and if it did, tag us in a pic of it on Instagram! Until next time- Hannah


It’s your day to win! Find all the biggest and best lotteries available to play right now with Lottery today on the KhelRaja platform. We ensure you have instant access to upcoming draws, tickets, and rules, so you never miss a chance to participate. As your dedicated online lottery and money-making gaming platform, we simplify the process of playing, making it part of the best gaming experience we provide. Check out the latest draws, pick your lucky numbers, and secure your Lottery today ticket for a chance at instant riches.